
The Ultimate Guide to Perfecting Your Winged Eyeliner
Winged eyeliner has been a timeless beauty trend that adds a touch of glamour and definition to any eye makeup look. Whether you’re a makeup novice or a seasoned pro, achieving the perfect winged eyeliner can seem intimidating. But fear not, with the right techniques and tips, you’ll be mastering this iconic look in no time! This guide will walk you through everything you need to know about perfecting your winged eyeliner. From the essential tools to different techniques, we’ve got you covered.
Understanding the Basics of Winged Eyeliner
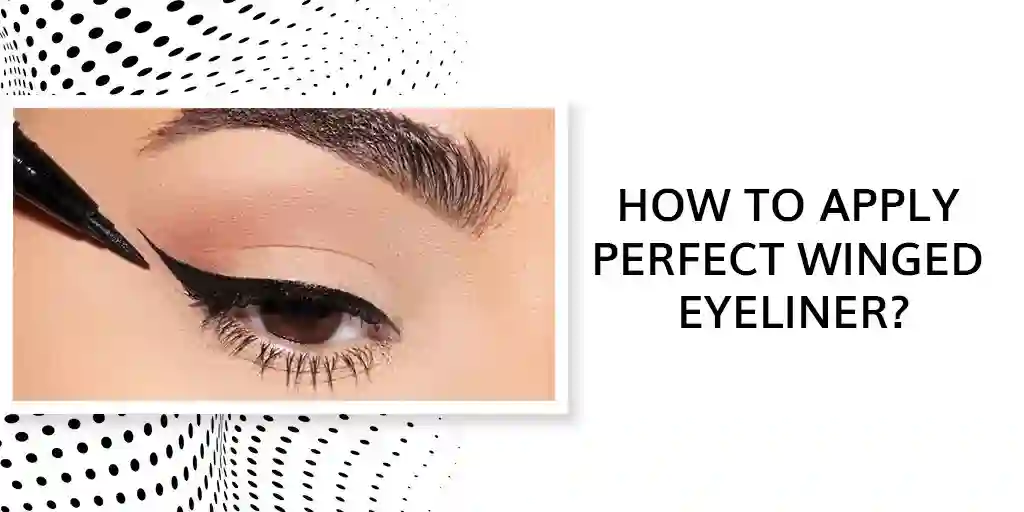
Before diving into specific techniques, it’s important to first understand what winged eyeliner is. This look involves extending eyeliner beyond the natural line of your upper lash line, creating a sharp, upward flick that resembles the shape of a wing. The precision required to perfect this look is what makes it a bit tricky, but with some practice, you’ll soon be able to apply it like a pro.Essential Tools for Winged Eyeliner
To create the perfect wing, you’ll need a few essential tools. Here are the key items to include in your makeup bag:- Eyeliner: You can choose from a variety of eyeliner formulas, including liquid, gel, pencil, or felt-tip pen. Each has its pros and cons, so select the one you feel most comfortable working with.
- Angled Brush: If you’re using gel eyeliner, an angled brush helps create sharp, precise lines.
- Eyelash Curler: This tool ensures your lashes are lifted before applying eyeliner, making the wing stand out even more.
- Makeup Remover: Even if you’re a pro, mistakes can happen. Having a makeup remover or micellar water on hand will help you clean up any uneven lines.
Step-by-Step Guide to Applying Winged Eyeliner
In this section, we’ll break down the steps for perfecting your winged eyeliner. Whether you’re just starting or looking to refine your technique, following this step-by-step guide will help you achieve a flawless winged eyeliner look.Step 1: Start with a Clean Base
Begin by prepping your eyelids. Make sure your eyes are clean and free of oils or makeup residue. Apply a light layer of eyeshadow primer to ensure your eyeliner stays in place throughout the day. A well-prepped base creates a smooth surface for your eyeliner and helps it last longer.Step 2: Draw the Wing Outline
Start by drawing the wing’s outline. Use a pencil or liquid eyeliner to create a small, angled line that extends from the outer corner of your eye toward the tail of your eyebrow. The angle of the line depends on how dramatic you want your wing to be, so feel free to adjust this based on your personal preference.- Tip: To create a symmetrical look, imagine an invisible line extending from the lower lash line toward your eyebrow. This is where your wing should go.
Step 3: Fill in the Wing
Once the outline is set, fill in the wing with more eyeliner. Be sure to keep the line as smooth as possible, and make sure there are no gaps in the wing’s shape. You can also slightly thicken the base of the wing for more drama.Step 4: Draw the Upper Lash Line
Now, move on to the upper lash line. Start from the inner corner of your eye and draw a thin line along your lashes. Gradually thicken the line as you approach the wing. For a subtle look, keep the line thin and natural. If you want a more dramatic appearance, go for a thicker line.Step 5: Refine and Clean Up
After completing the eyeliner, take a cotton swab dipped in makeup remover to clean up any mistakes or uneven lines. You can also use a concealer to perfect the edges of the wing and sharpen its shape. This is an essential part of the process to ensure your wing looks precise and defined.Types of Winged Eyeliner Looks
There are various types of winged eyeliner looks, each offering a different vibe. Whether you’re going for a natural day look or a bold evening appearance, understanding the different styles will help you decide what works best for you. Below are some popular winged eyeliner styles:Classic Winged Eyeliner
The classic wing is timeless and perfect for any occasion. It features a sleek, elongated wing with a defined edge, giving your eyes a subtle lift.- Tip: For a softer effect, opt for a brown eyeliner instead of black, especially for daytime looks.
Cat Eye Winged Eyeliner
A more dramatic and bold version of the classic wing, the cat eye extends the wing farther and adds more intensity to the eyes. This look works well for evening events and adds a seductive touch to your makeup.- Tip: To enhance the cat eye, consider adding false lashes for extra volume.
Double Winged Eyeliner
For those who love experimenting with their makeup, the double-winged eyeliner look involves creating two separate wings—one on the upper lash line and one on the lower lash line. This edgy look is great for a more daring, fashion-forward appearance.- Tip: Use a gel liner for the lower lash line to achieve a smooth, precise line.
Smoky Winged Eyeliner
If you want a smudged, sultry look, the smoky wing combines winged eyeliner with a smudged shadow. The key to achieving this look is blending your eyeliner into eyeshadow, creating a smoky effect that still retains the wing’s structure.- Tip: Use a pencil eyeliner for the lower lash line and smudge it with a brush for a smokier effect.
Common Mistakes to Avoid
While applying winged eyeliner may seem simple, it’s easy to make mistakes, especially if you’re just starting out. Here are some common errors to watch out for and tips on how to avoid them:1. Uneven Wings
One of the most common mistakes when applying winged eyeliner is uneven wings. To avoid this, always make sure you’re working in small sections and comparing both eyes as you go. A trick is to apply eyeliner on one eye, then use a mirror to check the symmetry before moving on to the other.2. Overly Thick Liner
Sometimes, it can be tempting to make your winged eyeliner thicker than intended, which can make your eyes look smaller. Keep your eyeliner thin at the inner corner of the eye and gradually thicken the line as you move outward. Less is more when it comes to eyeliner!3. Smudging
If your eyeliner smudges throughout the day, it’s often a sign that you’re using the wrong formula or haven’t set it properly. For long-lasting results, use a waterproof or long-wear eyeliner, and consider setting it with a matching eyeshadow to prevent smudging.4. Inconsistent Angles
When creating the wing, make sure the angles on both eyes are consistent. If one wing is too steep or too flat, it will throw off the balance of your look. Use the same technique on both eyes and follow the natural contours of your eye shape for the best results.Tips and Tricks for a Perfect Wing Every Time
Achieving the perfect winged eyeliner doesn’t have to be stressful. Here are some additional tips and tricks to help you out:- Use Tape for Precision: If you’re struggling with creating even wings, you can use a piece of tape to create a straight line. Place it at an angle from the outer corner of your eye toward your brow, then follow the line with your eyeliner.
- Practice Makes Perfect: Don’t get discouraged if your wing isn’t perfect the first time. Winged eyeliner takes practice, so keep trying until you get the desired look.
- Consider Your Eye Shape: Different eye shapes may require different winged eyeliner techniques. For example, almond-shaped eyes look great with a soft wing, while round eyes can benefit from a more dramatic flick.